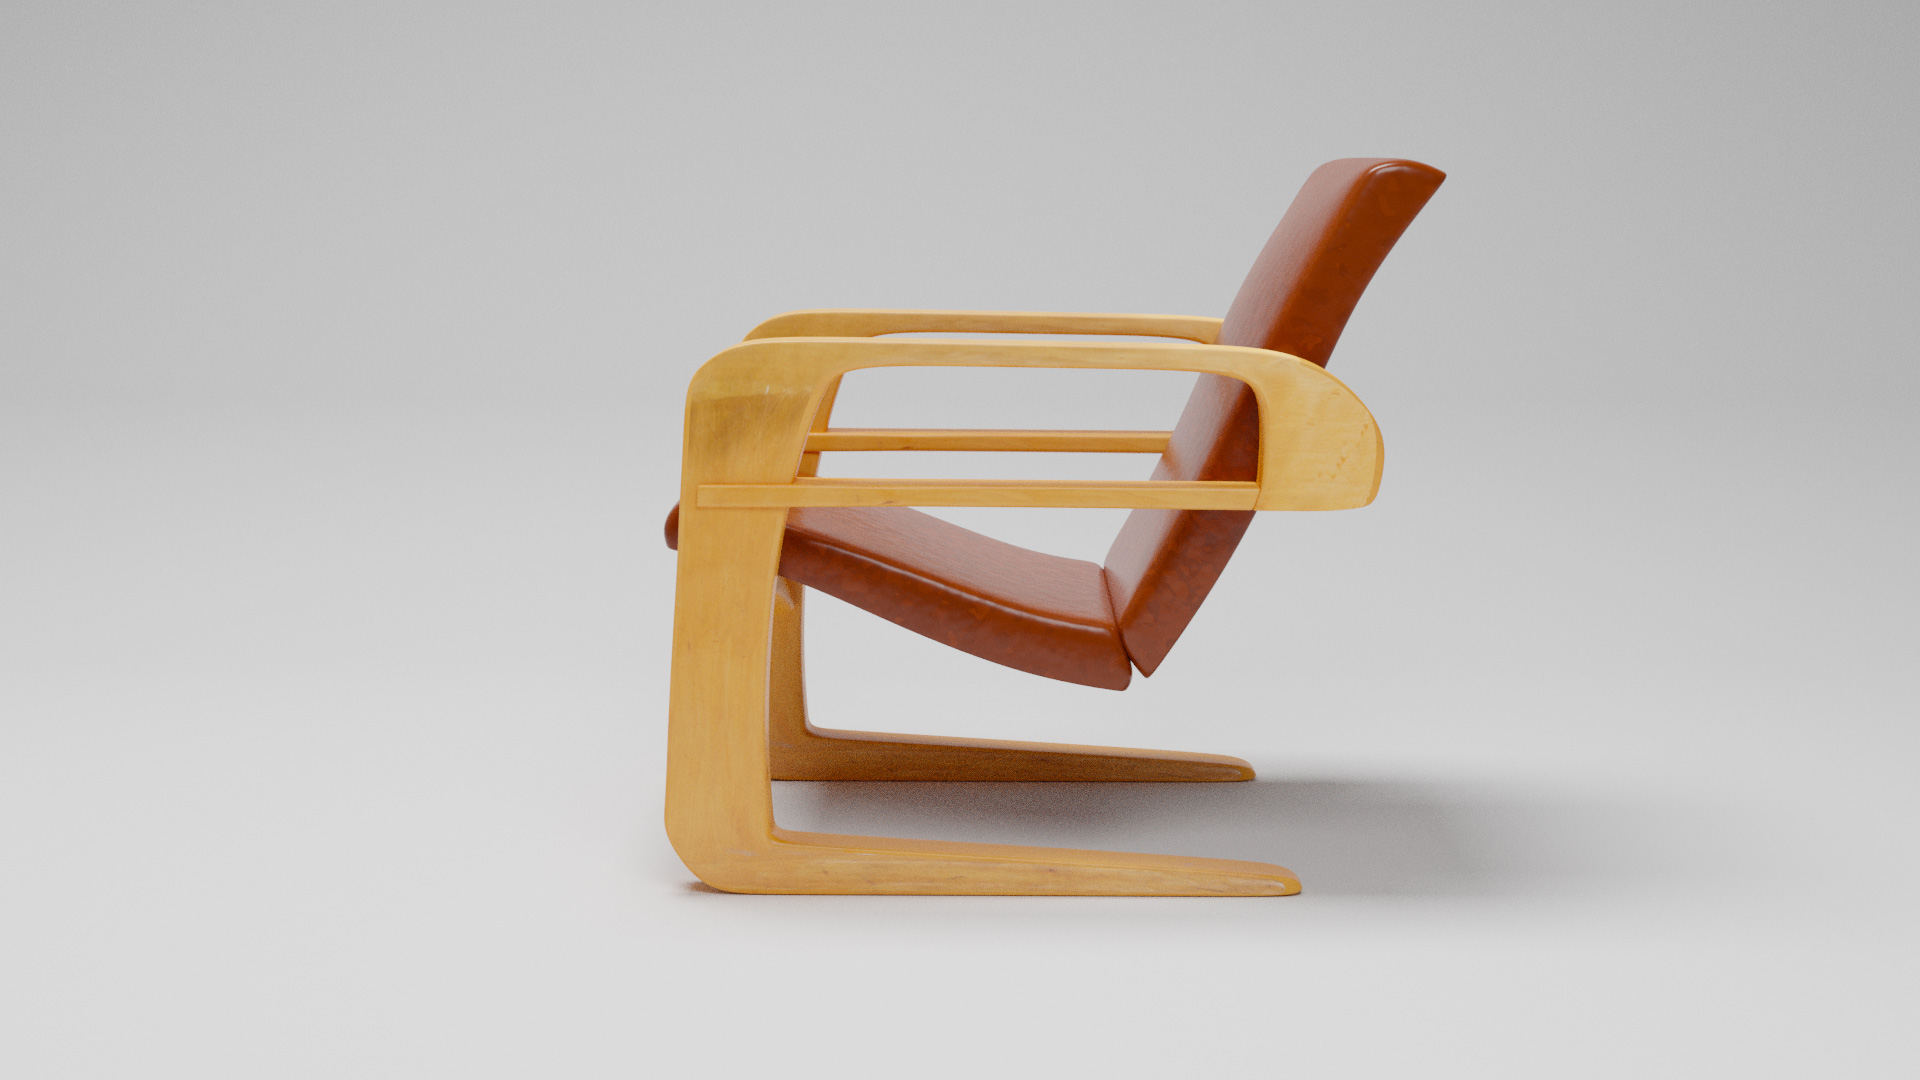
In this exercise, you will continue 3D modeling and begin texturing. There are different tutorials and exercise submission requirements for three experience levels. Choose the experience level that matches your own.
Learning Resources
Level 1: Novice Students
- Blender Foundation - Videos 16-20: Blender Fundamentals 2.8
- LinkedIn Learning - Chapter 4: Textures and shading
- Chair Modeling Reference:
- Airline Chair: Download
- Modeling reference: Speed modeling a chair
Level 2: Intermediate Students
- Blender Foundation - Videos 16-20: Blender Fundamentals 2.8
- Lynda - Chapter 4: Textures and shading
- Jayanam - Blender 2.8 PBR Texturing for Beginners
- How To Setup PBR and Displacement in EEVEE AND Cycles Blender 2.8
Level 3: Experienced Students
- Flipped Normals - Introduction to Sculpting in Blender 2.8 - Sculpting Essentials
- Blender 2.8 - How to bake textures - Tutorial
- Retopology for Beginners in Blender 2.8 - Retopo the Correct Way
- How To Setup PBR and Displacement in EEVEE AND Cycles Blender 2.8
Steps to Completion
Choose a either level 1, level 2, or level 3 to complete based on your prior experience with 3D tools. If you are a novice, choose Level 1. If you have some experience, choose Level 2. If you are very experienced with 3D tools, choose Level 3.
| Level 1 Steps | Level 2 Steps | Level 3 Steps |
Level 1:
- Duplicate the project folder and continue working on your model from the previous exercise. Optionally, you can start with this project file.
- Refine the Kem Weber Airline Chair you began modeling. (Be careful not to accidentally create nurbs primitives when modeling)
- Skills to practice include:
- Subdivision surfaces
- Adding bevels and edges
- Ensure normals are facing the proper direction
- Skills to practice include:
- Clean up your edge flow.
- Unwrap the chair’s parts’ UVs using the various methods and tools described in the tutorials.
- Export a UV map for each part and save it in the project folder as uv_1.jpg, uv_2.jpg, etc.
- Import the UV maps into Photoshop and create textures to match the Airline Chair as closely as possible.
- Save the textures as arm_color.jpg, cushion1_color.jpg, etc. in the project folder. Name the files in an organized in a logical way.
- In Blender, set up the chair’s textures so they are visible on the model.
- Save the 3D scene file as texture-YOURNAME in the project folder.
- Compress the project folder once you’ve completed the tutorial and rename it texture-YOURNAME-L1.zip.
- Upload the .zip file to the assignment dropbox.
- Ensure you’ve included everything properly. Failure to ensure that you’ve uploaded the file will result in your exercise being graded according the grading criteria.
Example Level 1 folder structure
texture-YOURNAME-L1.zip
|
├── [chair part]_uv-texture-YOURNAME.jpg (as many as needed)
├── [chair part]_color-texture-YOURNAME.jpg (as many as needed)
└── chair-texture-YOURNAME.blend
Level 2:
- Duplicate your project folder from the previous exercise and rename it to texture-YOURNAME-L2.
- For each of the three objects you modeled in the last exercise: a. Unwrap the object’s UVs b. Export a UV snapshot (UV wireframes) c. Create a color texture in Photoshop (1024px by 1024px).
- Save each of the three scenes in the scenes folder as:
obj1-texture-YOURNAME
obj2-texture-YOURNAME
obj3-texture-YOURNAME - Save your UV snapshots in the sourceimages folder as:
uv1-texture-YOURNAME.jpg
uv2-texture-YOURNAME.jpg
uv3-texture-YOURNAME.jpg - Save your color textures combined with AO texture in the sourceimages folder as:
color1-texture-YOURNAME.jpg
color2-texture-YOURNAME.jpg
color3-texture-YOURNAME.jpg - Compress the project folder once you’ve completed the tutorial and rename it texture-YOURNAME-L2.zip.
- Upload the .zip file to the assignment dropbox.
- Ensure you’ve included everything properly. Failure to ensure that you’ve uploaded the file will result in your exercise being graded according the grading criteria.
Example Level 2 folder structure
texture-YOURNAME-L2.zip
|
├── uv1-texture-YOURNAME.jpg
├── uv2-texture-YOURNAME.jpg
├── uv3-texture-YOURNAME.jpg
├── color1-texture-YOURNAME.jpg
├── color2-texture-YOURNAME.jpg
├── color3-texture-YOURNAME.jpg
├── obj1-texture-YOURNAME.blend
├── obj2-texture-YOURNAME.blend
└── obj3-texture-YOURNAME.blend
Level 3:
- Watch the level 3 tutorials.
- Continue working on your model from the previous exercise.
- Retopologize the mesh.
- Create two maps: A diffuse map and a normal map.
- Follow the Normal Maps and Nodes tutorial to connect the textures to the creature’s shader.
- Save your file as texture-YOURNAME.blend
- Save your diffuse map in the project folder as diffuse-texture-YOURNAME.png.
- Save your normal map in the project folder as normal-texture-YOURNAME.png.
- Compress the project folder once you’ve completed the tutorial and rename it texture-YOURNAME-L3.zip.
- Upload the .zip file to the assignment dropbox.
- Ensure you’ve included everything properly. Failure to ensure that you’ve uploaded the file will result in your exercise being graded according the grading criteria.
Example Level 3 folder structure
texture-YOURNAME-L3.zip
|
├── diffuse-texture-YOURNAME.png
├── normal-texture-YOURNAME.png
└── texture-YOURNAME.blend