In this exercise, you will practice creating a rig for a polygon mesh. You will create a simple biped rig starting with the base mesh FBX file.
Learning Resources:
Lynda.com: Character Rigging
Lynda Tutorials: 12 Principles of Animation
Steps to Completion
- Watch the level rigging tutorials.
- Download the base base mesh FBX file.
- File → Import the FBX mesh into a new Blender scene.
- Scale up the model.
- Add subdivisions (edge loops) to the polygonal mesh to minimize unwanted distortion when posing the mesh. Add geometry to articulate the knee, elbows, and arms.
- Object → Apply all transforms including scale, rotation, and location.
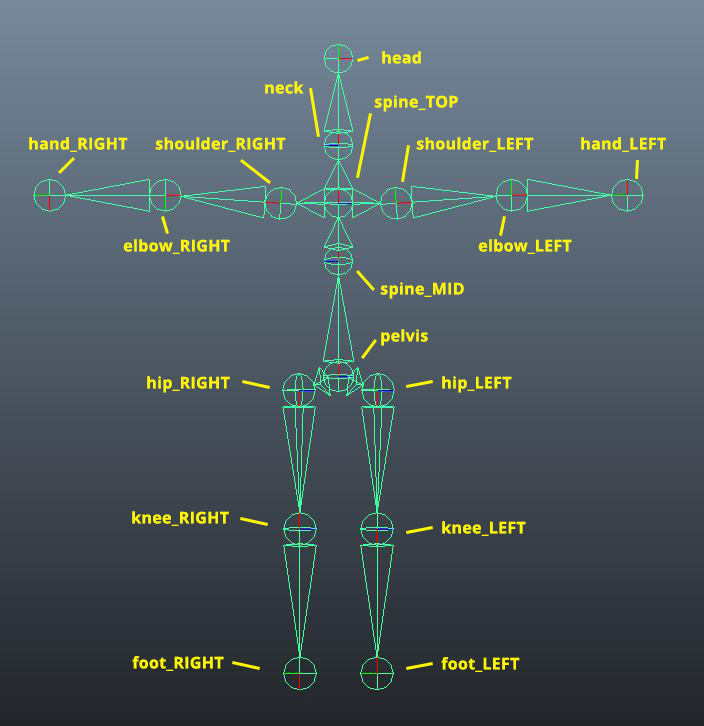
- Create joints for the torso, hips, knees, legs, feet, shoulders, arms, neck, and head. Name and number them for your reference. See image below:
- Attach the armature to the polygonal mesh. Do this by selecting the mesh first, select the armature, and then press ‘CTRL-P,’ and choose “with automatic weights.” If you do not see this option, you have selected in the reverse order.
- Adjustments the weight influence where needed to create a posable character.
- Pose the biped to be in a sitting pose. (You can add a chair if you like)
- Save your scene as rigging-05-YOURNAME in the project folder.
- Compress the project folder once you’ve completed the tutorial and rename it rigging-05-YOURNAME.zip.
- Upload the .zip file to the dropbox.
- Ensure you’ve included everything properly. Failure to ensure that you’ve uploaded the file will result in your exercise being graded according the grading criteria.