In this exercise, you will practice keyframing, animating the camera, and creating deformers. Level 1 students will create a simple demonstration of basic animation and camera movement. Level 2 and 3 students will create an animation inspired by tetris.
Learning Resources
Tutorials: Levels 1, 2, and 3
Animation Tools
Lynda Tutorials: Maya Essentials 5: Animation Tools
Digital Tutors: Camera Animation
Tutorials: Levels 2 and 3
Principles of Animation
Digital Tutors: 12 Principles of Animation
Steps to Completion
Choose a either level 1, level 2, or level 3 to complete based on your prior experience with 3D tools. If you are a novice, choose Level 1. If you have some experience, choose Level 2. If you are very experienced with 3D tools, choose Level 3.
Level 1 Steps | Level 2 Steps | Level 3 Steps
Level 1:
- Watch the animation tutorials from Lynda and Digital Tutors.
- Create a new project folder called animation-YOURSTUDENTID-L1, set your scene to the project folder, and create the sub folders by choosing File → Project Window → Accept.
- Create an animation with the following:
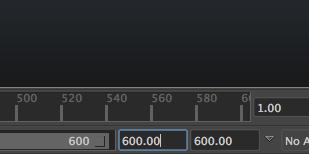
- The duration of the animation should be 600 frames.
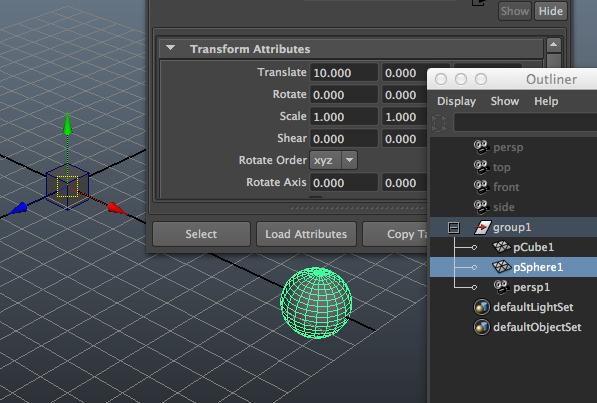
- Create a centered cube parented to group1 in the Outliner.
- Create a sphere parented to group1 in the Outliner. It should be at least 10 units away from the cube, and revolve concentrically around the cube. (HINT: Their pivot points should be the same location)
- Animate pSphere1 to rotate concentrically in the y-axis around the pCube1, twice(720 degrees).
- Animate the group1 to move from 0 to positive 20 units in the y-axis direction from frame 0 to 300, and move back to the origin from frame 300 to 600. (The sphere should follow the cube as it moves up and down because they are both in group1.)
- Create a perspective camera slightly above and looking at the cube. Include persp1 within group1 so that it can follow the cube as it moves up and down.
- Go into the Graph Editor and make your pSphere1 rotation tangents linear.
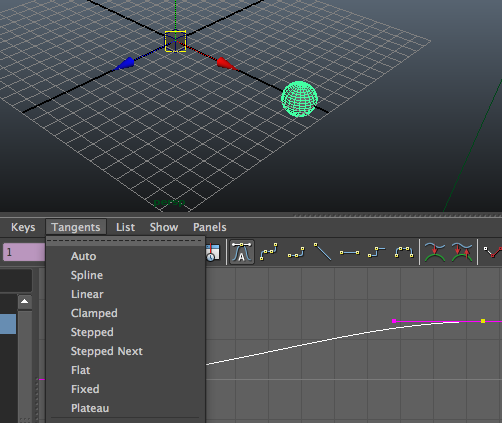
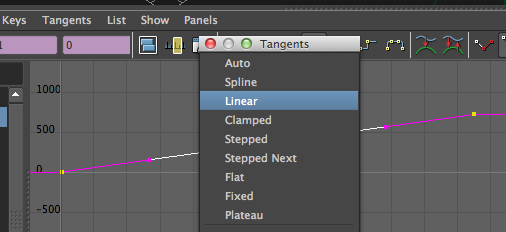
- Your sphere should now loop seamlessly with the beginning of the animation.
- The duration of the animation should be 600 frames.
- Save your scene as animation-YOURSTUDENTID in the scenes folder.
- Compress the project folder once you’ve completed the tutorial and rename it animation-YOURSTUDENTID-L1.zip.
- Upload the .zip file to the submission dropbox
- Ensure you’ve included everything properly. Failure to ensure that you’ve uploaded the file will result in your exercise being graded according the grading criteria.
Example Level 1 folder structure
animation-YOURSTUDENTID-L1.zip
|
└── animation-YOURSTUDENTID-L1
    |
    ├── sound/
    ├── scripts/
    ├── scenes/
    |   |
    |   └── animation-YOURSTUDENTID.mb
    |
    ├── renderData/
    ├── particles/
    ├── movies/
    ├── images/
    ├── data/
    ├── clips/
    ├── cache/
    ├── autosave/
    └── assets/
Level 2:
- Watch the animation tutorials from Lynda and Digital Tutors.
- Create a new project folder called animation-YOURSTUDENTID-L2, set your scene to the project folder, and create the sub folders by choosing File → Project Window → Accept.
- Create an animated scene inspired by Tetris. It must include the following:
- At least 8 moving pieces
- Camera movement
- Easing applied to keyframes of moving objects (non-linear tangents in graph editor)
- Camera shake
- At least 10 seconds of animation at 24 frames per second (240 frames)
- Save your scene as animation-YOURSTUDENTID in the scenes folder.
- Compress the project folder once you’ve completed the tutorial and rename it animation-YOURSTUDENTID-L2.zip.
- Upload the .zip file to the submission dropbox
- Ensure you’ve included everything properly. Failure to ensure that you’ve uploaded the file will result in your exercise being graded according the grading criteria.
Example Level 2 folder structure
animation-YOURSTUDENTID-L2.zip
|
└── animation-YOURSTUDENTID-L2
    |
    ├── sound/
    ├── scripts/
    ├── scenes/
    |   |
    |   └── animation-YOURSTUDENTID.mb
    |
    ├── renderData/
    ├── particles/
    ├── movies/
    ├── images/
    ├── data/
    ├── clips/
    ├── cache/
    ├── autosave/
    └── assets/
Level 3:
- Watch the animation tutorials from Lynda and Digital Tutors.
- Create a new project folder called animation-YOURSTUDENTID-L3, set your scene to the project folder, and create the sub folders by choosing File → Project Window → Accept.
- Create a creature animation using only primitives inspired by Evolved Virtual Creatures. It must include the following:
- At least 2 creatures with 3 moving pieces appendages
- Camera movement
- Easing applied to keyframes of moving objects (non-linear tangents in graph editor)
- Camera shake
- At least 10 seconds of animation at 24 frames per second (240 frames)
- Save your scene as animation-YOURSTUDENTID in the scenes folder.
- Compress the project folder once you’ve completed the tutorial and rename it animation-YOURSTUDENTID-L3.zip.
- Upload the .zip file to the submission dropbox
- Ensure you’ve included everything properly. Failure to ensure that you’ve uploaded the file will result in your exercise being graded according the grading criteria.
Example Level 3 folder structure
animation-YOURSTUDENTID-L3.zip
|
└── animation-YOURSTUDENTID-L3
    |
    ├── sound/
    ├── scripts/
    ├── scenes/
    |   |
    |   └── animation-YOURSTUDENTID.mb
    |
    ├── renderData/
    ├── particles/
    ├── movies/
    ├── images/
    ├── data/
    ├── clips/
    ├── cache/
    ├── autosave/
    └── assets/
Grading
Your grade will be assessed according to the Exercise Grading Criteria.